Types of External Door Handle
When equipping your external doors with a handle, you’ll have two broad categories to choose from. They are:
Lever Handles
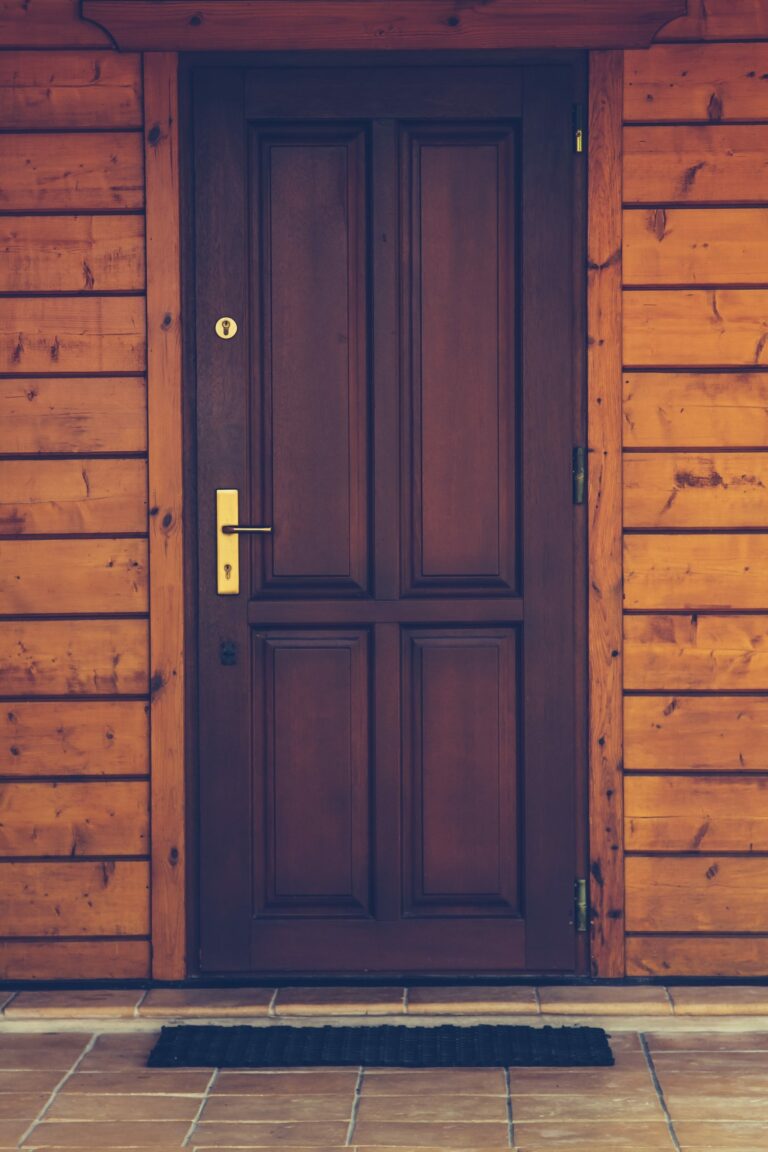
The lever handle is the preferred option for the overwhelming majority of UK homeowners. There’s an extensive variety to choose from, including those mounted on traditional backplates and those mounted on smaller ‘rose’ style circular plates. The latter are more difficult to fit, due to the need to screw them into a tighter circle of holes. They tend to be found more often on internal doors in commercial and office buildings, but they offer a distinctive look that might make a good match for your door.
For your external door, you’ll want to a backplate with a keyhole built-in. It’s used with a mortice sash-lock. For added security, you can add a second deadbolt on the inside of the door.
Door Knobs
Door knobs are the round sort that’s preferred in the United States. They can lend your front door a unique aesthetic, particularly if deployed in the very centre of the door (though in this position you’ll need a separate locking mechanism. However, they’re not able to offer quite the same leverage as a lever handle, and thus they’re a little bit trickier to open. Like lever handles, they come either with backplates, or without. You might also find an additional grub or threaded screw beneath the spindle itself, which runs all the way through the door and secures the handle in position.
What Materials Can External Door Handles Be Made From?
Similarly, you’ll have a choice of several different materials when shopping for an external door handle.
- Aluminium
- Brass
- Iron
- Pewter
- Stainless Steel
- uPVC
Each of these materials look different, and you’ll want to consider the colour of the surrounding door when making your choice. A black iron door handle will stand apart from a wax-finished oak door, while a brass one might complement darker shades.
Some materials, like pewter and brass, give off a different look depending on how they’re finished. By polishing the metal, you’ll lend the handle an added sheen that’ll make it stand apart. A similar effect can be achieved with the addition of certain sorts of finish - though some, like beeswax, aren’t suited for external use.
When considering the door handle material, you will also want to account for their ability to withstand the weather. Some metals will rust or ruin as they are affected by adverse weather conditions. Consider what material will last and what will uphold its condition well. You don't want to put time and effort into achieving a welcoming front door for it to be ruined by the furniture as it wasn't suited to exterior conditions.
How To Remove and Replace External Door Handles
Once you’ve decided which door handle will best match your exterior, it’s time to actually get it installed. Let’s therefore run through how to remove and replace external door handles. You’ll need a screwdriver. Check whether the heads of your screws are crosses or flats and select the appropriate screwdriver from your toolbox.
Step 1.
First, we need to get rid of the existing lockset, if there is one. Get the door open so that you can easily access the hardware. Using your screwdriver, extract the screws visible on the edge of the door. To access those underneath the plate, you might need to pry them away from the door using the tip of your screwdriver. Do so carefully to avoid scraping the timber.
Step 2.
Once everything is suitably loosened, you’ll be able to grasp both sides of the handle and pull them away from the door, before extracting the latch and deadbolt. Then turn your attention to the frame and remove the strikeplates. Keep these handy; if you don’t have a replacement, you’ll need to re-install them.
Step 3.
Measure the distance between the deadbolt and latch holes and ensure that your replacement assembly matches before attempting installation. Getting this wrong can be time-consuming and irritating, so it’s worth triple-checking.
Step 4.
You’re ready to install the new handle. Insert the latch bolt so that it lines up with the corresponding hole in the frame. Remember to get it the right way around; you need the angled side to face in the direction that the door closes, so that it is pushed into the door as it meets the strikeplate. Fasten the mechanism into position using the screws that came with the new handle.
Step 5.
Next, you can place the new cover plates. If they’re a little bit larger than the previous ones, you’ll need to enlarge the opening slightly using a chisel and hammer. Be careful while doing this, as you don’t want to overdo it and damage the door. Proceed in small chunks; you can always remove more timber, but you can’t put it back. If you’re unsure of your abilities, then don’t be afraid to call in professional help.
Step 6.
Next, you’ll need to secure the cylinder and plates to the door, followed by the handles. Finally, you’ll need to install any replacement strikeplates into the frame. Again, if the opening isn’t sufficiently large, you’ll need to break out the chisel to accommodate them.