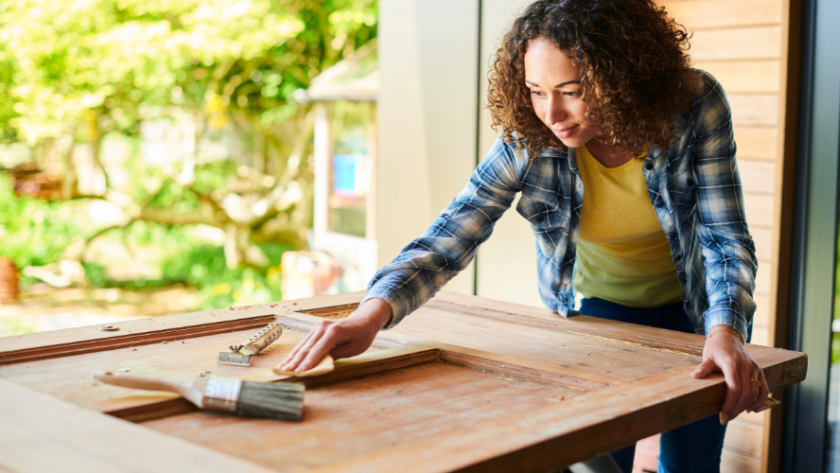
If you recently replaced any doors in your home, don’t automatically assume that they are useless and just throw them away (even if they are in a state of disrepair). With a few extra materials and a bit of imagination, the upcycling possibilities are endless! And if you fancy giving it a go, but don’t have any spare doors lying around, they are easy enough to find at salvage yards and auctions.
Here at Vivid doors we LOVE the idea of taking a simple door and creating an interesting piece of art or beautiful item of furniture. So, we’ve put together a few of our favourite door upcycling projects from across the web along with some top tips from the bloggers who created them!
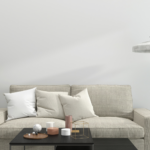
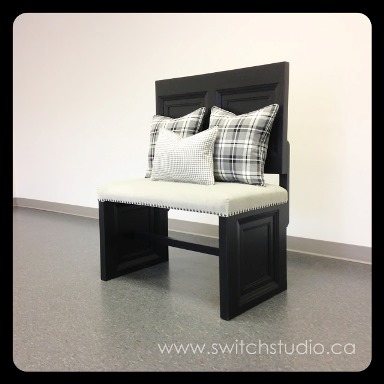
1. Staci’s Door to Bench
Staci Edwards at Switch Studio used her knowledge and experience in upholstery to create a stunning cushioned bench. It’s simple, sleek & modern but still holds a welcoming and homely feel. The door was created as part of the Fall Home Show’s Upcycle Challenge (which Staci won, congrats!) and we are sure that no one would ever guess this beautiful bench was made from an old door picked up at Habitat for Humanity!
What Staci had to say :
I knew I wanted to create a bench out of the door because I own an upholstery and sewing studio – So naturally I wanted to incorporate what I do, and some pretty fabrics! The door was a perfect size to create a sweet little bench, perfect for an entryway or little corner nook. The design came together pretty quick with a little sketch, as my background is in design, and we create custom furniture at my shop too.
I’m happy to say no challenges cropped up while designing or constructing, again it’s what we do daily here at Switch Studio.
My tips are:
- Plan ahead of time for any project.
- Sketch it out {something rough is fine, no need to get fancy} so that you know it will work before you start.
- If you’re doing a piece of furniture, also be sure to measure where it’s going in your room so that you make it to fit.
- And lastly, always style your projects well. It makes such a difference in adding wow factor. For example, my bench would have been cute as is, but by adding the nailhead trim detail and coordinating throw pillows, it made it that much more special!

Check out Staci’s blog post about her project here.
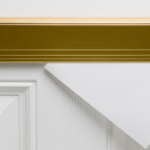
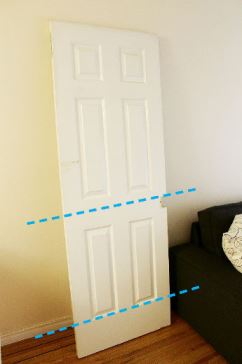
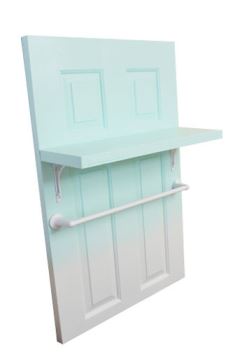
2. Julia’s Hanging Shelf
1. Julia Dilworth of JuliaDilworth.com is a lovely blogger from Canada with an interest in upcycling and home décor. Julia created this beautiful hanging shelf unit which has the simple vintage kind of vibe that we love and will add character to any room it’s used in.
What Julia had to say:
What inspired me: This DIY project was part of a local upcycle challenge put on by the Habitat for Humanity charity. So this meant that whatever I made, it had to be something people would actually spend money on at an auction (pressure!). I had a lot of ideas, but wanted to really push myself, and go all-out because it was for a good cause. Using a saw isn’t something I had done ever, so it was risky, but it was key to the vision I had. Out of all the door upcycle projects I’d seen, I thought this idea really used the parts of the door well and completely changed its function into a (hopefully) useful piece of decor.
Thoughts on the finished project: I was really happy with how it turned out, there were definitely some bumps in the road, and if I had to do it again I would have made a smaller (shorter) version, or used a lighter, cheaper door. This door was a wood hollow-core and yet even at half its size, quite heavy. So anyone that took it home would have to secure it on the wall really well. (It was so heavy I couldn’t carry it by myself to the auction!).
How hard it was: This was not an easy project. In theory, it’s simple, but so much rests on your ability to cut straight with a saw. I had ZERO experience and I found a way to do it, but it was stressful, tiring and a miracle it turned out straight. Especially because the bottom piece you chop off to make the shelf, this has to be straight or else it will be all wonky when you screw it together.
Interesting/scary moments: Sawing with an old rusty handsaw was as hilarious as it was difficult. It was slow going and I had to readjust a lot. There was a lot of sweating and swearing. And my arm hurt for a week. Also everything went wrong: the shelving brackets I bought were slightly different sizes and I didn’t have time to get new ones; the white spray paint was running out RIGHT at the point when I was ombre-ing the bottom, spitting spurty blobs everywhere (nightmare). The shelf wasn’t perfectly even, I got paint all over my floors, and paint in my lungs (from stupidly spray painting inside — do not do this!) The craziest thing that happened was that I mastered the straight handsaw line in the end. The key is you need a straight piece of wood to guide your saw cut. So the second cut I made was perfect.

Check out Julia’s project blog post here
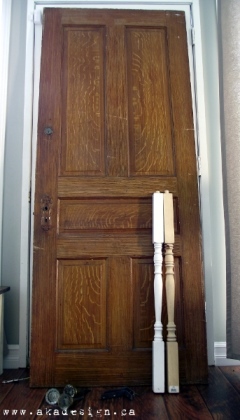
3. Marie’s Homely Headboard
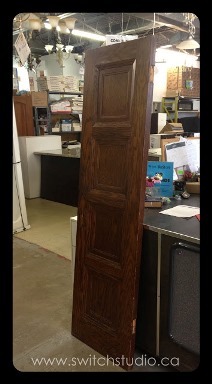
Marie Blackburn of Interior Frugalista created a gorgeous headboard to go with her beautifully decorated French boutique style bedroom. After a trip to Home Reusables where she picked up a lovely, old 5 panel door; Marie created this piece which she also gave an interesting distressed effect!

What Marie had to say:
During a visit to a local architectural salvage dealer I came across a few old solid core 5-panel doors. Inspired by a headboard I saw on Pinterest, I decided this door would be perfect for a headboard transformation.
You will need a table saw and mitre saw to complete this project. The most challenging part is knowing how to cut crown moulding so the corner joints are tight and knowing how to make a French cleat to anchor the headboard to the wall. To give it a shabby chic appearance the first coat was painted in an accent color that worked well with the room. The second coat is a light white wash/dry brush technique. Once dry it was distressed using a fine sandpaper to reveal the color underneath. We love our headboard and are very proud of what we accomplished!

Check out Marie’s project blog post here.
4. Shannon’s Entry Table
1. Shannon Acheson of AKA Design is yet another lovely blogger from Canada (maybe there is something in the water over there?). Shannon and her husband made a completely attention grabbing piece of furniture that would be perfect for a hallway. It has a great rustic feel and would be a unique addition to any home!
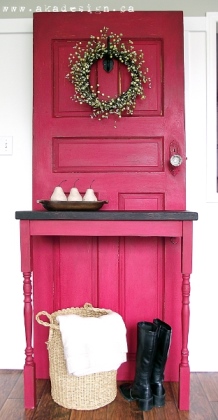
What Shannon had to say:
We wanted a door with plenty of character for the upcycle so we looked for one that was heavy and thick with panels that could be emphasized. Originally we were going to make a bench and not a table. But since the project had to be portable (to go to the home show) and couldn’t be anchored to a wall (a bench would have been top heavy) it became a table! We had just been given some samples of a line of milk paint and thought the deep red and dark wax would lend itself well to the character we mentioned.
It was a fairly easy project, except for the part about making it stand on its own. If it had been for our own house we would have made it how I envisioned it originally as a bench and anchored it to the wall. When we realized how heavy it was, that was a little scary!
In the end though, we both loved how it turned out and were more than a little sad to see it go (even though it was for a good cause!).

Check out Shannon’s project blog post here.
5. Lilah & Nick’s Cabin
This 5th project is slightly different to the rest, and definitely not an easy one to replicate! But we just had to include it because of the tremendous amount of work and vision that owners Lilah Horwitz and Nick Olson had to put in to create it. The two artists let their imaginations run wild and developed the “silly drawing” from a first date conversation to reality and built this beautiful cabin out of windows and doors. The results are breathtaking, as is the story behind the idea and the words that Lilah gave us about the project.
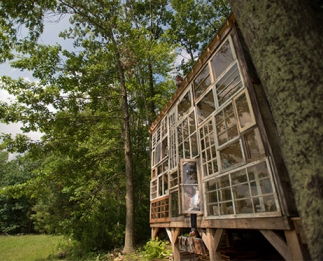
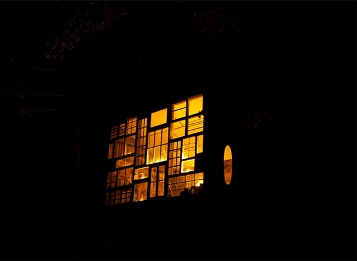
What Lilah had to say:
The idea was something that we talked about on one of our first dates. It was really just a silly drawing on a scrap of paper! We romanticized over the idea of building something with a whole wall of windows, mostly thinking about watching a sunset or star gazing from the inside of a house. Being artists, naturally we are obsessed with light (whether we know it or not), so of course we got carried away with the concept of having the light of the outdoors be central to the indoors.
It started as a lovers whisper, and then, the circumstances seemed to make the stars align and we just went for it. It was a risk, but we are both young and realized that’s prime time to do things that might not be completely practical!
Now looking at the project it is hard to believe that we were able to build it just the two of us. It’s amazing to live in a home you built, and it’s a wonderful treat to watch the stars from your bed at night!

You can watch a short documentary about Nick and Lilah’s cabin here, visit Lilah’s website here and the blog that Nick contributes to here.
6. Laura’s Bar Station
Laura of Finding Home made this great bar station. The gorgeous weathered look of the door they used gives us a beachy, party feeling that screams summer cocktail parties! Along with the carefully considered added touches such as the coca cola bottle opener, the vintage style of this piece would be a great touch of character to any garden!
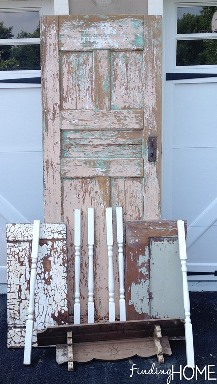
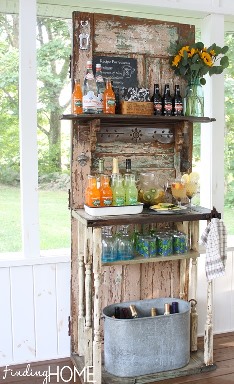
Laura goes into detail about how she created the bar station, and when encumbered so elegantly with an abundance of colourful, fruity beverages, who could resist the urge to create one of their very own!
Check out Laura’s project blog post here.
7. Amanda’s Chalkboard Collage Door
The 7th upcycled door project we love comes from Amanda Medlin of Naturally Chic Mama. Amanda had a door taking up space in her shed and was one day inspired to make something for her sons’ room. What she created was a chalkboard collage door which displayed photos of her boys and allowed for messages to be written on the sections painted with chalkboard paint.

The result is lovely piece of decoration for her kids’ room which is simple while still unique and eye-catching. We think this is a great project for those who find the more complicated upcycles slightly overwhelming!
Check out Amanda’s project blog post here.
8. Mary Jane’s Photo Door
Next up is the upcycling project of Mary Jane from Photog Mommie. It’s often the hallway that we overlook when it comes to decorating our homes. The living room, kitchen, bathrooms etc. all seem so much more important! The hallway, however, is the first room of your house that a person will see so take a lead out of Mary Jane’s book and try creating a one of a kind photo display to greet you and your visitors!
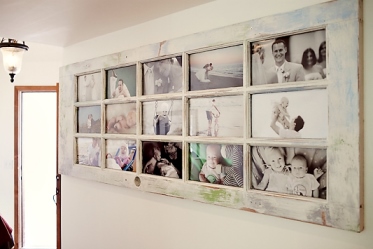
The distressed look compliments plain walls and adds character to what is usually minimalistic area. The photos added to the door take the tradition of hanging portraits in the hall to another level and is certainly an eye catching way to do so.
Check out Mary Jane’s project blog post here.
9. Stacy’s Privacy Screen
Stacy Risenmay of Not Just a Housewife added some quirky and colourful pieces to brighten up her garden, one being a screen made out of doors.

The simple idea, easy to construct, is quite the eye catcher and adds a certain abstract feeling to the garden from bringing interior doors to the exterior. Not sure why, perhaps it’s the carefully pruned topiary plant, but this project keeps taking my mind to Alice in Wonderland. This is the perfect example of sometimes less being more!
Check out Stacy’s project blog post here.
10. Kim’s Quirky Desk
This final addition to our door upcycling favourites is this desk project by Kim of Reposhture Studio. We love the projects that have taken doors and turned them into items of décor. But what we love about Kim’s upcycle is, not only does it look great, it’s also a very functional piece which is highly unique!
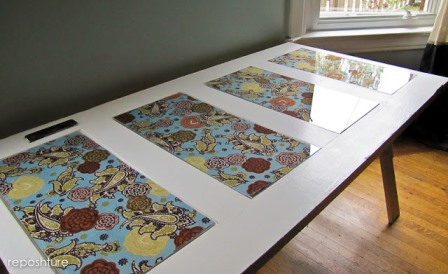
The sturdy desk is sleek and modern with colourful additions to the panels to compliment the colour scheme of the room and add character. We love it!
Check out Kim’s project blog post here.
These are just 10 of some truly great upcycle project out there on the web, let us know what your favourites are!